CS255 - Home/Project Assignment
CS 255 - Computer Organization and Assembler Programming
Project 4
Due date: See Class Webpage
Observe the Emory Honor Code when doing homeworks.
1. Purpose
This is your first assembler programming assignment and
it is very easy to do.
The difficulty of this assignment is:
setting up
the
EGTAPI
programming environment - espcially if you want to
work from home.
Please start early, because when things don't work;
you will need my help to set it up; and I may not be
available late at night on the due day.
The purpose of this homework is primarily to allow you
setting up
and
to get used to
the
EGTAPI
(Emory Graphical Tool for Assembler Programming Instruction)
system before the
real project assignments
are given, and introduce you to the EGTAPI programming
environment.
The tutorial of the
Emory Graphical Tool for Assembler Programming
Instruction (EGTAPI) can be found here:
I suggest you print a copy out and have it at hand when you
do this assignment.
What is EGTAPI:
You must
install
EGTAPI
on your
laptop first !
2. Install EGTAPI
on your laptop
- Download and install EGTAPI
from the following URL:
After downloading the file, you
must
create a directory
called (say)
cs255
and
extract the downloaded compressed
archive into this
cs255 directory in your laptop.
- After you have extracted the files, open a file browser and
go into the cs255 folder.
Click on the Egtapi icon to start EGTAPI.
3. Working on CS255 assembler assignments
- How you can
work on
CS255 assembler programming assignments:
- To work on your
assembler program,
you must use
the EGTAPI tool
- Run EGTAPI on your laptop
(and you can even work from home !)
- EGTAPI is
also
available on the workstations in the
CS lab
|
|
- There are
2 ways
that you can work on your
assembler programming projects:
- You can
work from anywhere
with EGTAPI installed
on your laptop:
- Install EGTAPI on your laptop (see above) and run it
- Log in and select a workstation from the list
|
Through EGTAPI,
you will be esentially working
on a lab machine; but
from anywhere !!!
(We call this tele-commuting)
- Use a workstation in
the CS Lab is:
- Go
to the CS lab
on the 3rd floor of the MSC building
- Login to some lab machine
- Open a terminal window
- In the terminal window:
run
EGTAPI
using this command:
/home/cs255001/bin/egtapi
|
|
|
4. Preparations
- To do this project, you must obtain a copy of the prepared
files.
Follow the instructions below to obtain a copy of the
prepared files - which will be copied into your
~/cs255/pj4 directory
on the MathCS system
- Start EGTAPI (on a lab machine or on your laptop).
- Login:
click here
After logging, you can use
one of the following 2 methods to obtain the files.
Method 1 is the easiest.
- Method 1:
- Click on
File Browser
(top menu bar in EGTAPI)
- In the File Browser side bar,
click on the
Prepare tab.
- In the Egtapi Prepare pop up window,
select: Section Number = 1 and
enter pj4 in the
Project Code field.
- Then clcik the Prepare button
(and close the Prepare window when done)
- The verify that it was successful,
click Refresh in the
EGTAPI File Browser window -
you should see the
pj4 folder.
|
- Method 2:
Click on: Terminal in EGTAPI
(for details, see:
)
click here
A 2-part window will open up at the bottom.
The top part is an output window and the bottom part is
an input window.
Type in (or cut and paste) the following commands (one at a time) into
the bottom (input) window:
   mkdir  ~/cs255/pj4

   cp /home/cs255001/Handouts/pj4/*  ~/cs255/pj4

   ls  ~/cs255/pj4   // You should see: pj4.s and egt.pj4.arm listed
|
If you see pj4.s and
egt.pj4.arm listed, you are good to go.
Otherwise, repeat the above steps.
If all else fails, seek help (instructor or TA)
When you are good to go, click on
Terminal to close the terminal.
|
5. The Skeleton Project File "pj4.s"
The assignment consists of 10 easy questions given inside
the assembler program pj4,s
that was copied into your project directory
through the
preparation step above.
You must edit the
project file "pj4.s"
and write the
required assembler instructions
in this program file.
How to edit the project file
pj4.s file:
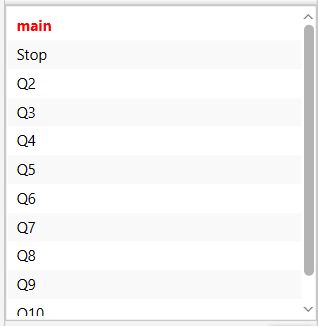
The skeletal program has
10 sections, labeled as
Q1, Q2, ..., Q10
where you put
assembler instructions
- Advice:
- Do the project piece meal:
- Write the assembler instructions for
question 1 at label Q1
- Then compile and
run the
program pj4.s
- When Q1 is done,
do Q2, and so on
|
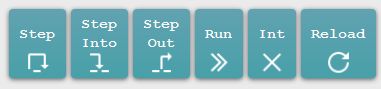
- When you test the
assembler instructions for
a question, use
the STEP button
(for explanation of
the menu buttons, see
this webpage:
click here )
- When you want to skip over
an already tested
section of the project, use
the RUN button ---
it will skip to the code of
next question
(for explanation of
breakpoint, see
this webpage:
click here )
|
- Assignment:
- Read the instructions given
inside pj4.s and:
- Write the
assembler instructions
the each answer in the corresponding
section of
Q1, Q2, ..., Q10
in the pj4.s file.
   Q1:    ans_b = 44;
   Q2:    ans_s = -99;
   Q3:    ans_i = 444;
   Q4:    ans_b = x;
   Q5:    ans_s = x;
   Q6:    ans_i = x;
   Q7:    ans_b = y;    (Can you explain why ans_b != y ?)
   Q8:    ans_b = z;    (Can you explain why ans_b != z ?)
   Q9:    ans_s = z;    (Can you explain why ans_s != z ?)
   Q10:   ans_i = y;

Pre-defined variables used by the program:

   ans_b:  byte
   ans_s:  short
   ans_i:  int

   x:      byte  11110011                            (=    -13 decimal)
   y:      short 00001000 00001001                   (=   2057 decimal)
   z:      int   00000000 00000010 01000000 00000111 (= 147463 decimal)
|
|
|
Recall from the lecture(s) that:
- Byte type variables
are one byte in length,
- Short type variables
are two bytes, and
- Integer type variables
are 4 bytes long.
|
Warning:
- Be very careful and use the
correct operand size in
each assembler instruction.
In other words:
be careful when you load
a value, make sure you used
the correct ldr instruction:
- Use ldrsb when you
load a byte value
- Use ldrsh when you
load a short value
- Use ldr when you
load a int value
|
And be careful when you store
a value, make sure you used
the correct str instruction:
- Use strb when you
store a byte value
- Use strh when you
store a short value
- Use str when you
store a int value
|
|
There are some more helpful hints
on testing your program in the
next section !!!
6. Running/testing the program
7. Turn in
Note:
- Unlike other classes, in CS255,
you must turn in your program pj4.s
(electronically) by using the
the following turnin procedure
before the due date:
  1. Click on File Browser in EGTAPI

  2. Select the assembler program file that you want to turn in

  3. After selecting the file, click on Turnin

     The "Egtapi Turn-in" window will pop up

     Examine the file content and make sure that's the file you want to turn in


  4. In the "Section Number" drop down tab:

          Select "1" if you are in Section 1

          Select "2" if you are in Section 2

  5. Enter "Project Code":  pj4

  6. Click the "Turn in" button

  7. You will see the turn in result in the right most panel.

     Make sure that your see the message: "Program ... has been successfully turned in..."
|
Alternately, you can turn in using EGTAPI Terminal:
  1. Open the EGTAPI Terminal (click on "Terminal")

  2. Enter these command in the lower input area of the Terminal panel:

       (a)  cd  ~/cs255/pj4

       (b) /home/cs255001/turnin  pj4.s  pj4  // If you're in section 1
  or
       (b) /home/cs255002/turnin  pj4.s  pj4  // If you're in section 2
|
If you want to see what you have turned in, then
  1. Open the EGTAPI Terminal (click on "Terminal")

  2. Enter this command in the lower input area of the Terminal panel:

       /home/cs255001/turnin    // If you're in section 1
  or
       /home/cs255002/turnin    // If you're in section 2
|
-
Extension request